Friday, June 10, 2022

Airplane Hauler project, pg 4... cont'd

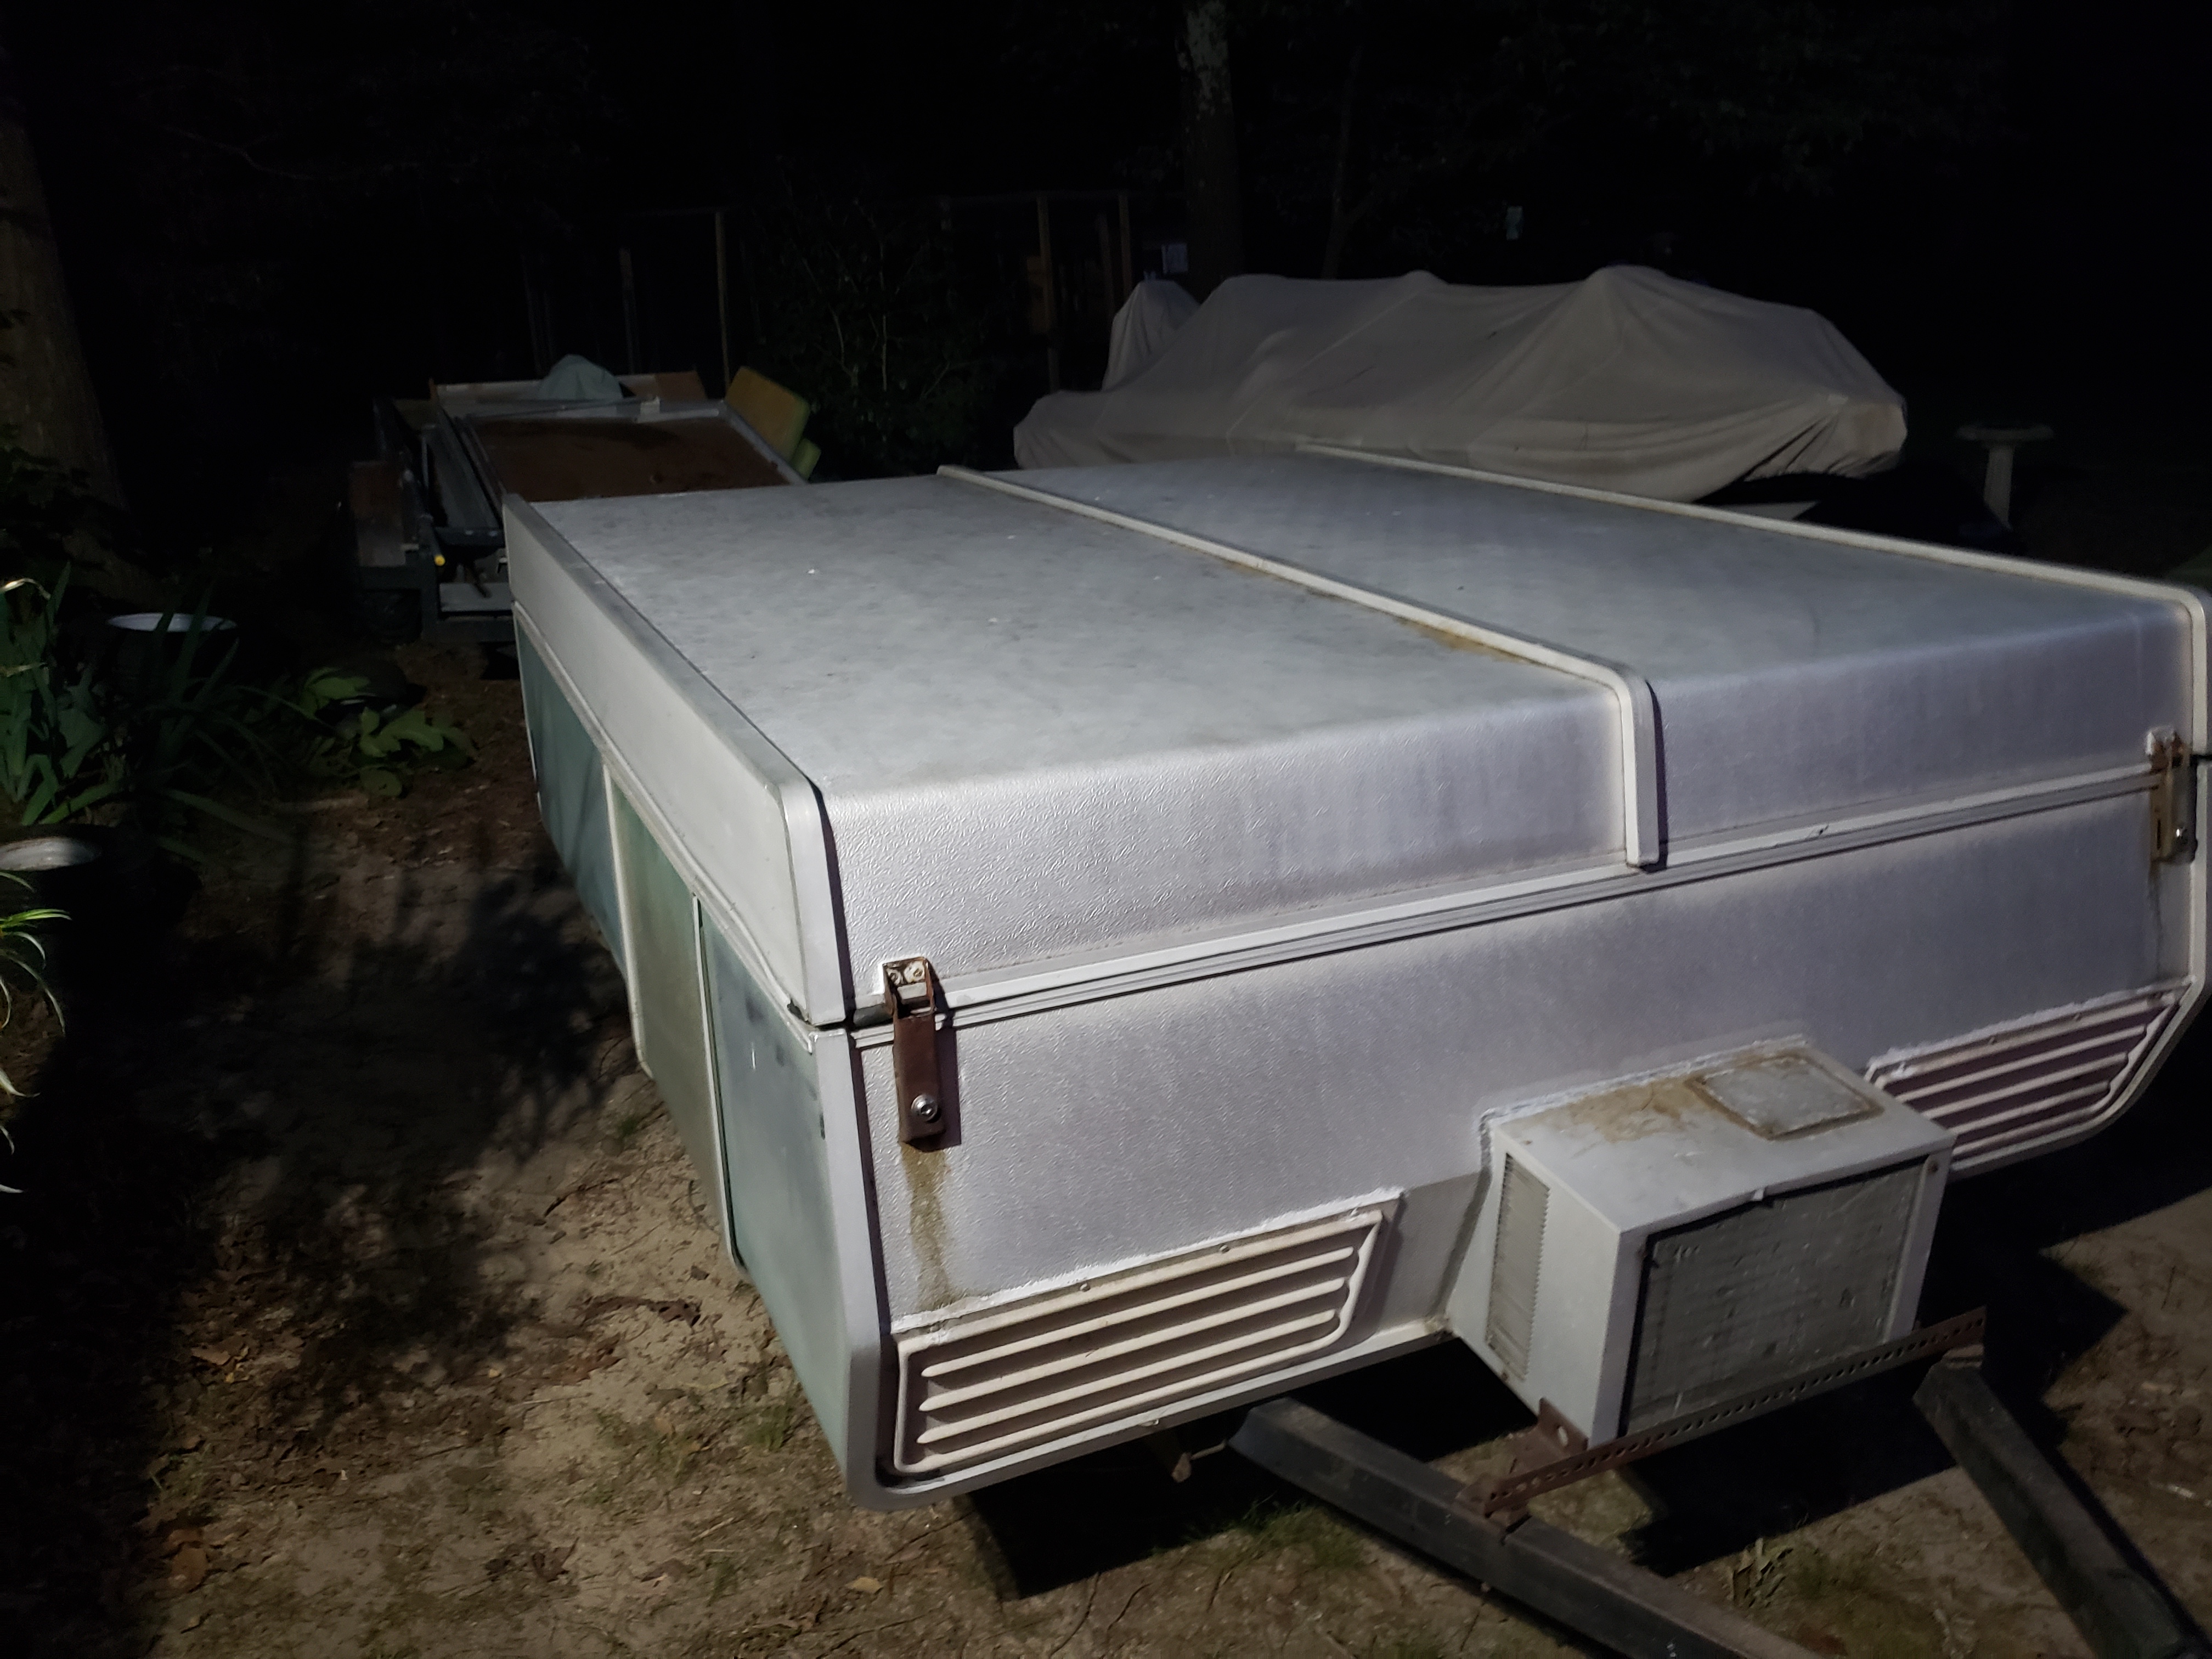
 I got back on this project, today. I'm trying to get it finished up and in use, so I can haul the left overs out to the land fill :-) . The first task I jumped on today, was to get rid of that old AC unit in the front of the trailer. It was cut in and through the front covering, but nothing structural. I cut away the old caulk, and after a bit of wrestling with the AC unit, it came out through the front. The original full size door for the pop-up was stored in the lid when I got the camper, and I saved it as a possible material donor. The lower blank panel in the door was the same exact material used in the body of the camper, so I used the carbide saw and removed it. I was able to easily bend it to fit the front contour, and install it to fill the hole where the AC was previously located. It's now ready for caulk. The old AC support bracket was also removed. This lightened up the nose of the trailer and cleaned things up a bit.


This nasty looking thing has to go! I was afraid of bending the camper body while fighting with piles of old caulk someone had applied, but patience and a sharp knife won out :-)


The patch panel I salvaged from the front door was a perfect match for the material. Boy, was I glad it had the old door for donor material use!
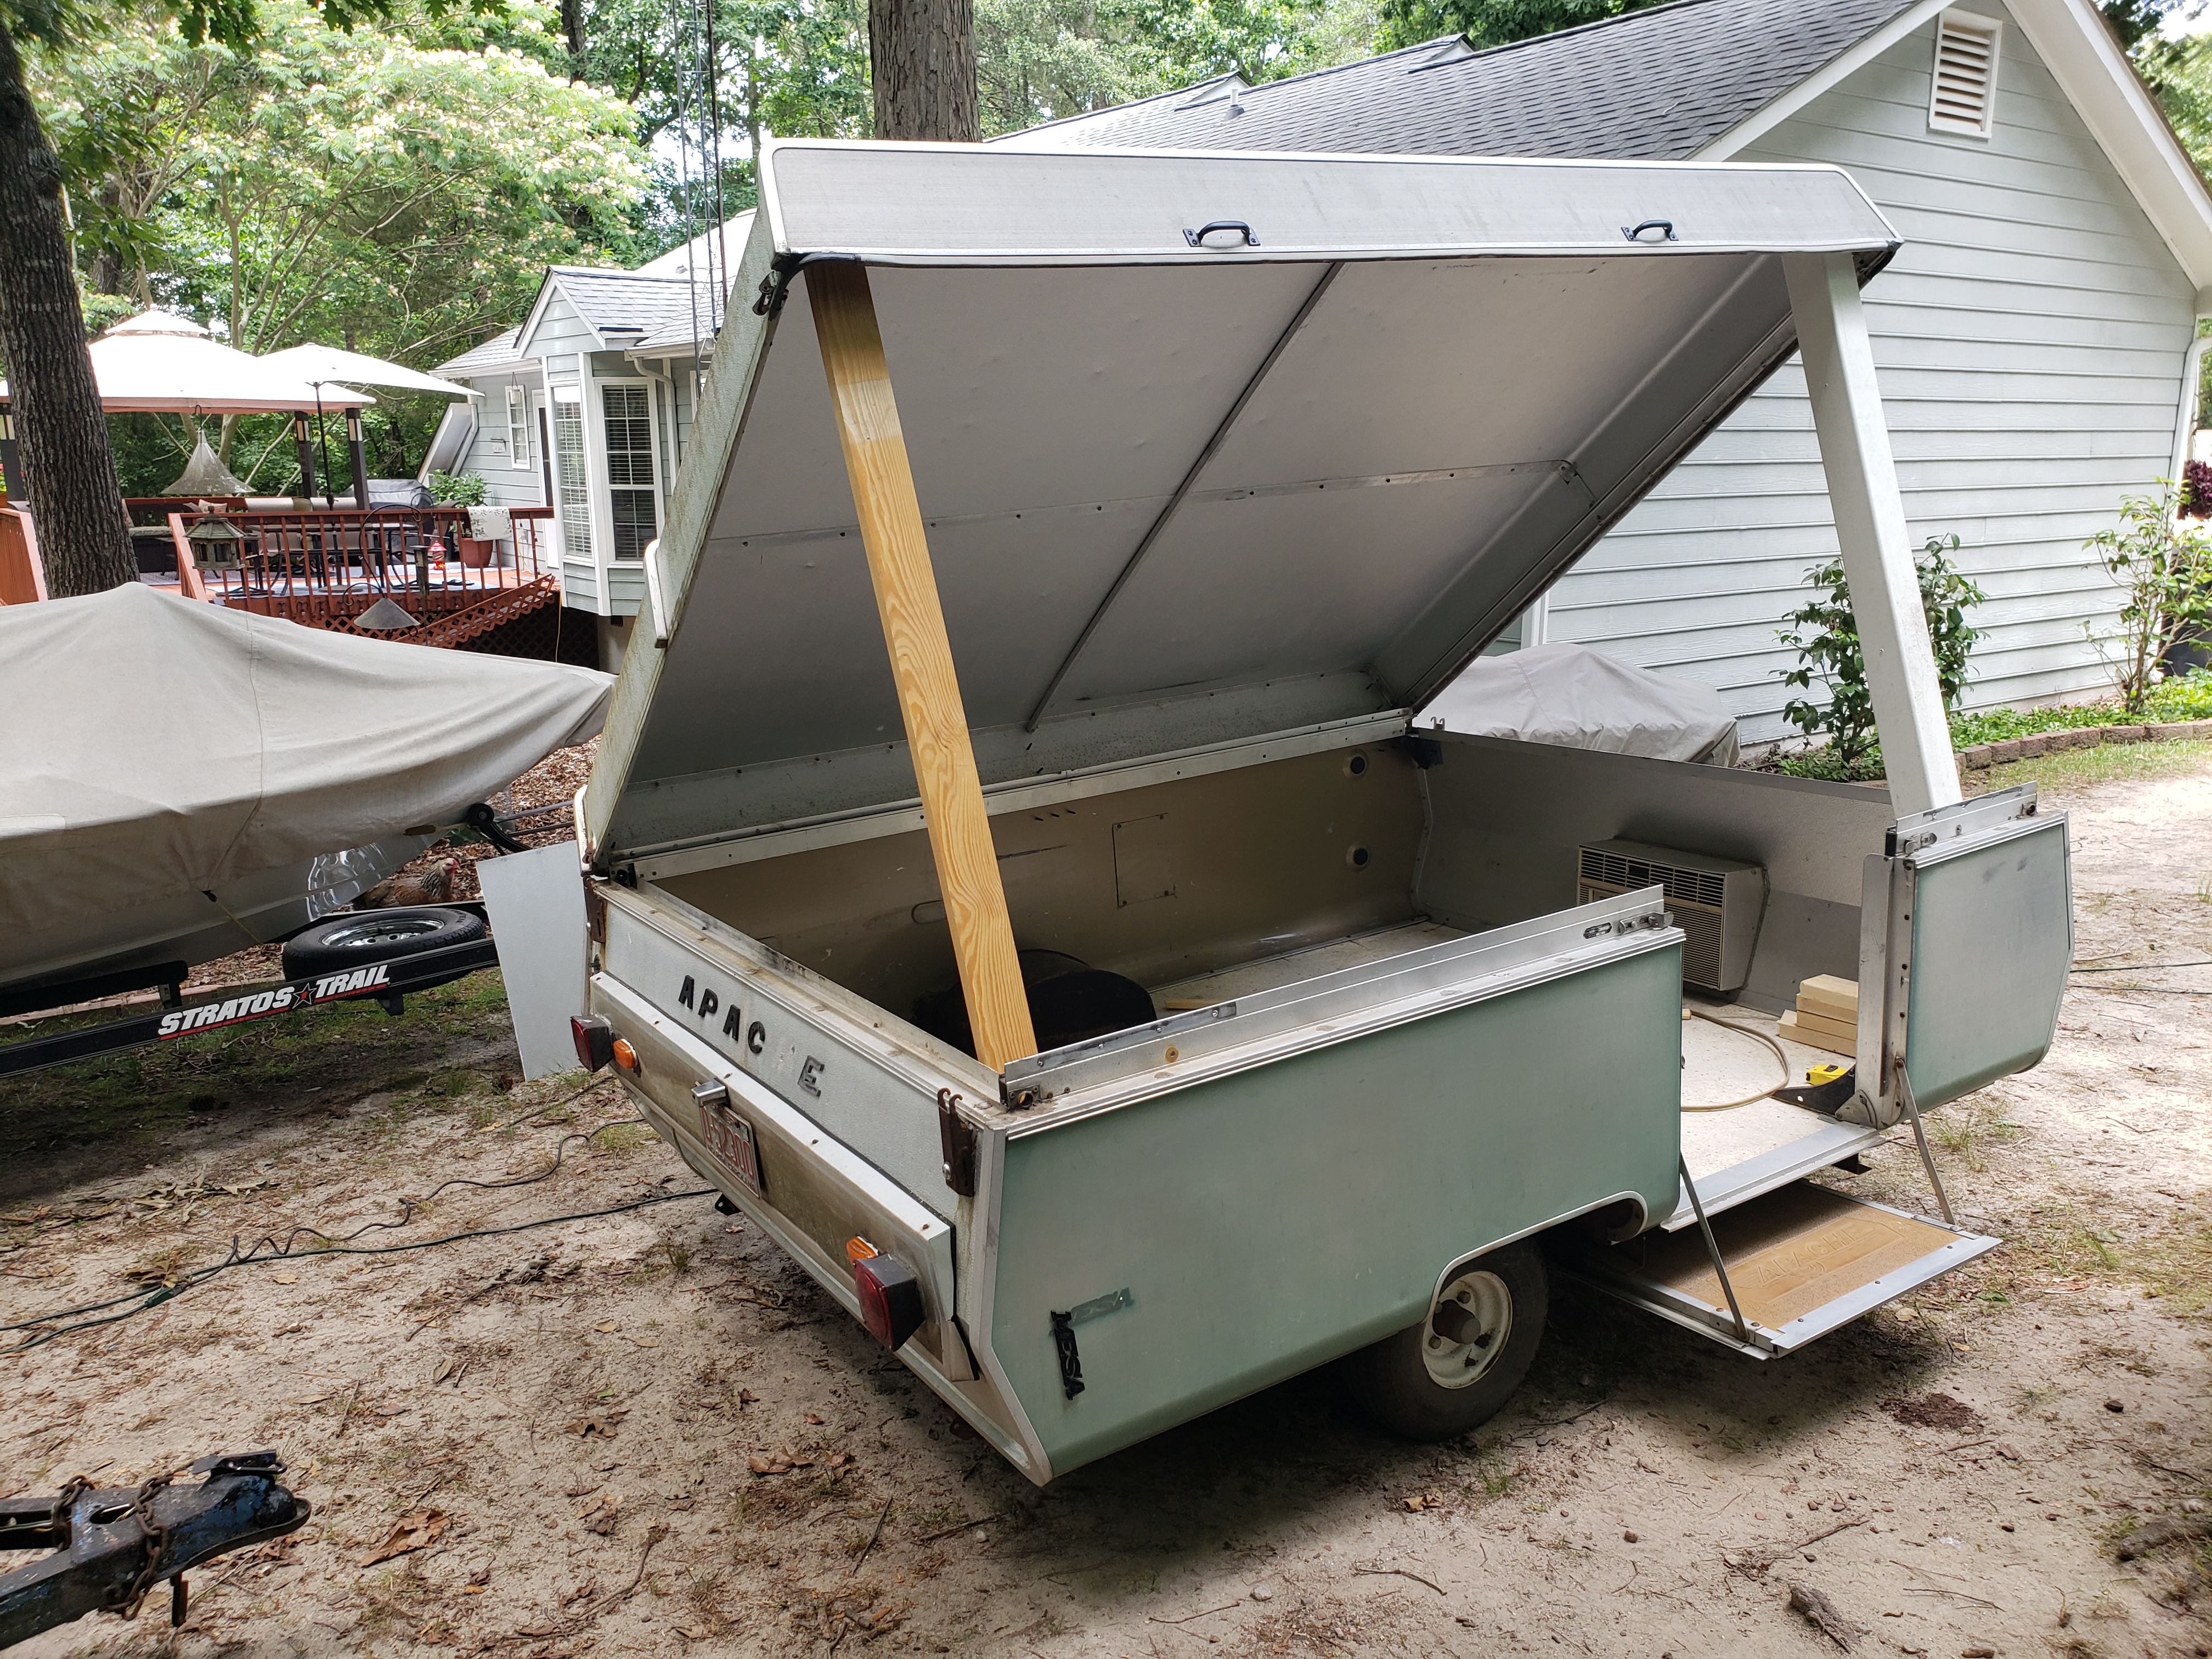

You can see the old AC unit protruding into the inside of the camper. It didn't waste a lot of space, but it did add a bunch of weight to the front of the trailer. 


Here's a photo of my redneck sheet metal brake :-) . I was able to duplicate the angle of the front of the camper like this, then simply install the patch panel with sheet metal screws.


Patch panel in place and ready for caulk to keep the H2O out. I'll be able to add one of those aluminum trailer tongue boxes to the frame, just ahead of the body. I had one of those on my last trailer and it's was very handy... a great place to store the generator, fuel, etc.


A photo from inside, with some of the old caulk on the floor that was removed. I need to caulk the area around the new panel, now. Maybe I'll just caulk inside, so as to not have those messy caulk lines on the outside. 


A pair of black lift handles were installed on the lid. I've ordered nitrogen charge lift cylinders to install on either side of the lid, they'll be here in a couple of days. Hopefully, the handles will make it easy to start the lid opening process, and the cylinders will handle the rest of the chore so props or restraints won't be needed...


I removed the old latches from the perimeter of the camper's top section. They need cleaning and paint. While off, I'm hoping to find replacement locks to install in them...headed to Lowe's in the morning to have a look. 


A look inside...time to get some scrubbing done to the interior and see if I can reuse the old vinyl floor covering, or if I have to replace it with some checkerboard floor tiles. Since I'm trying to keep this on the cheap, I vote for the first idea :-)


This is about the height I hope to open the lid with the lift cylinders... I ordered 23" units and have marked up the trailer frame with the approximate location for the cylinder mounts...


Using one of my spare trolling motor batteries and an ohmmeter, the wiring was sorted and the tail lights are now all operational. A flat 4 pin connector was fitted up.


A new folding nose jack was installed on the frame, and the old broken plunger-style jack was removed. This will make it much easier to move around, as well as easier to get hitched to the truck! I'll be applying a nice coat of black chassis paint to the exposed part of the frame, once the aluminum etchant is completed.


To wrap up the day's work, I replaced all of the self taping hardware I used for the initial hinge setup, with 1/4-20 stainless steel hardware. The holes were drilled a bit larger, and bolts replaced the screws. The installation is much more solid and won't rust / stain the outside of the body.


http://www.RCDave.net


Wednesday, June 8, 2022

Airplane Hauler project, pg 3... cont'd

 Work is still moving along on the Airplane Hauler project. I modified a set of barn door hinges for the lid, used the carbide disc saw to remove some protruding aluminum extrusion from the upper cabinet, and got the lid hinged. I'm now searching for a pair of lift cylinders to assist with opening the lid and with holding it up, once open. I have to return to the hardware storage to obtain better bolts to permanently secure the new hinges, I used what I had on hand to keep the project moving and get the hinging worked out. 


Above you can see the lid hinged and partially lifted for testing. I'll try to remove that small amount of green finish and then use an etching brightener on the body to lighten it up a bit.


Here's a pic from the other side, you can see my wooden props temporarily holding the lid up. I'm thinking of fabricating a wing rack on the far wall, and maybe in the lid.


Airplane Hauler project, pg 2... cont'd

I jumped right into the project as soon as I got this beast home. All of the interior had to go, so I cut the supporting structure and the lifting mechanism from the top, and set the top off to one side. Then, the slides, pull-outs, canvas sections, interior cabinets and seat frames, etc were all removed. My 5 x 8 utility trailer was filled with debris for the land fill from the inside of this thing. The work went on until well after dark while trying to reach a milestone before stopping for the day. I found the wood flooring in great condition with no rot or water damage, which is surprising, considering it's been in the woods since 2007 (15 years, as of this writing!). The vinyl floor covering is OK but dirty, I may replace that, but need to scrub it first and see how it looks. At the end of the day, the top easily dropped back in place and this old camper was considerably lighter. 


The photos above are of the old pop-up camper, after the interior was completely removed. It has a solid floor, and the entire body is aluminum...very lightweight! Once I've decided on the floor covering, I'll begin installation of wheel chocks for fuselages, wing storage, and a way to secure the field support gear inside.


Here's a pic of the all-aluminum top, off of the camper and leaning against one of the boats. I plan to hinge this, and use lift cylinders to assist with opening and restraint in the "up" position.


The interior is very spacious, and should serve my purposes well. The old AC unit will be removed, and a patch panel fabricated from a piece of metal in the original full-size door.


The utility trailer is loaded with materials from the inside of the pop-up camper. The original door is seen on the ground to the right of the trailer, that's where the material for the patch panel will be taken from.


The above 3 pics are of the unit after the interior was removed, with the top back in place. I may be able to utilize the original 4 top latches, once they're removed and cleaned up. With the AC unit removed and the opening covered, I'll be able to add a chassis tool box to the frame for fuel and generator storage. A new spare tire rack and crank-up nose wheel will be installed up front as well.


Tuesday, June 7, 2022

Airplane Hauler project...

 I bought my last RC Airplane trailer back around 2006. I loved it, and it was convenient to have all my gear ready to go, just hook up and go flying. I would waste a bunch of time cleaning out the truck, taking airplanes down from the garage or workshop, loading them in, hauling to the field...and then the reverse when I returned home. I'd loose an hour just moving things around, not to mention the hangar rash from bumping into things in the process. Well, fast forward a few years...life got in the way and I was inactive. I sold the trailer around 2013 and most of my big stuff, and moved on. This was my previous hauler setup...I sure loved that thing!


Around 2016 I fabricated an elevated floor for my old Ford Escape. It wasn't great, but it worked and allowed a safe space to transport my wing panels below the airplanes. It was heavy and cumbersome, tough to get in and out of the truck, and made it aggravating to use the truck for other things. It only allowed for 1-2 airplanes and support gear to be loaded and hauled. It didn't last long... I pulled it all out and returned the truck to it's original setup. He's a look at that...


Fast forward to 2022...I'm pulling my old gear out of the "mothballs", making repairs, and getting back in the air. Once again, I found myself with issues of loading, unloading, storing, transporting, etc. However, while I bought my last 5x8 enclosed trailer for $1000, and a 6x10 enclosed trailer for about $1200, I found those numbers have REALLY changed! A simple 5x8 with no side door now starts at over $3500!! That's not happening. 

An old friend, the late Drake Edwards, had an airplane hauler that I always thought to be a great idea. Low profile for easy towing and reduced wind drag (important with my little Ford Escape tow vehicle!), light weight, and easy access. I think it was built from a old pop-up camper. I've been pondering this a while, and decided to go on a search. My wife had been watching marketplace and had found several. We settled on an old unit that's been off the road and in hibernation since 2007, bought it, drug it out of the woods, and pulled it home. My plan is to gut it, hinge the top lid, wire the inside for charging, and do a few trailer upgrades to it (spare tire rack, nose wheel, etc). Here's a few pics of what just followed me home for $200...


Saturday, May 14, 2022

Futaba Transmitter Case Repair

 I've had this Futaba transmitter case for several years. It's been pretty solid, but the bail on one of the latches broke. I replaced it with a latch for a Harley Davidson Tour Pack that fits the years 2009-2013. That's pretty much the same latch, and was an easy upfit. You can find these on eBay and Amazon, as well as your local Harley shop.  


http://www.RCDAVE.net

Friday, April 22, 2022

SD Models 35% Yak 54

Chris picked up a SD Models 35% Yak 54 at the RDRC swap meet. It was in pretty good shape, but needed a few things here and there. Chris wanted to add canisters to it to quieten it down a touch, and upgrade the electronics a bit. 


Once he got into the electronics, he discovered a receiver problem. We ran over to Raleigh Hobby and got a new receiver, batteries, and some other goodies. Chris got the electronics updated and operational. 


Next, the DLE-111 was having some trouble. We discovered the carb was plugged up with old fuel residue, and seemed to be missing some parts. We cleaned the carb and installed a rebuild kit. No luck...Rod, a member of RDRC, had a DLE carb he sold to Chris, and it worked perfectly! 


Chris wanted to quieten the engine a bit, so he sourced a set of canisters from another local, modified the fuselage, and got those installed.


She's finished! Chris got a few flights in on it, and everything worked correctly. Now, to get it back to him at home in Indiana, so he can get some serious stick time in on it. This was a fun project and it was great to be around with my oldest son as he had a chance to have some RC fun after many years!